
Combining Web Design with Original Art
Watercolour painting - landscape tutorial
And now for the fun bit ... smearing water colour on paper to see what happens ....! First we need some inspiration. It's OK for me here in Cumbria because around every corner there another painting. But if I am ever stuck I use Google Images and type in a subject that may inspire. Because you can't see out of my window, I found this landscape on Google. Before you start sketching, you do not need to include every little detail. Indeed, watercolour paintings lend themselves not to be too detailed. Ask yourself what is wrong with the scene and what 'gets in the way', then leave it out! This is what is called artistic licence. It is now time to sketch the scene onto your watercolour paper, not forgeting to use a soft pencil.
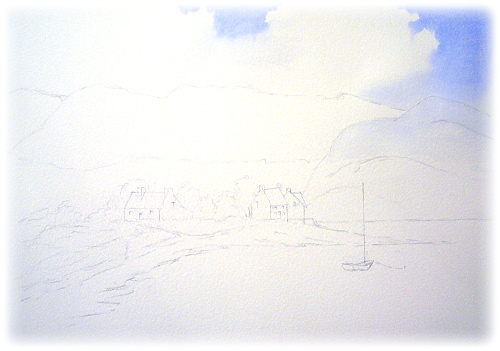 You will notice there are fewer buildings in my sketch than on the original image. Also, that the mountains have grown taller, the boat has drifted to the right and the
shore line has been extended towards the foreground on the right. That is my artistic licence, which I will explain. I have brought the mountains closer
so that they are more imposing; sailed the boat to give a more balanced painting; allowed the shore line to draw the viewer's eye to the buildings that
are too cluttered on the original image. Also, I like the shape of the central building and intend for it to be sunlit. And now the scary bit ...
painting. I generally start with the sky and aim to ensure that the light comes from the correct direction.
In this case, I am hoping for the sunlight to come from the right, lighting that building, with build-up of dark clouds on the left.
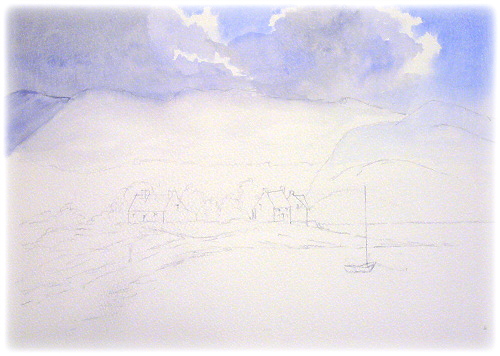
For painting skies I always remember a quote from David Bellamy when I was learning. It was to 'plan like a tortoise and paint like a hare'. This is a top tip. In this case, I mixed three washes for the sky. The first of pure French Ultramarine, then a mix of French Ultramarine and Burnt Umber, which makes a lovely grey, and then French Ultramarine and a touch of Light Red. With the sunlight from the right, a wash of French Ultramarine was applied to the right and centre. Some hard edges were allowed and soft edges made by adding clear water to the edges of the wash, drawing it down over the mountains. the other washes were then applied liberally to create the effect of cloud in shadow but leaving the silver linings on the side of the sunlight. Once completly dry, I used the Ultramarine and Light Red wash for the distant mountain on the far left.
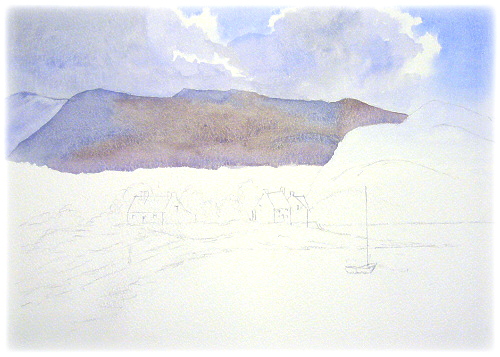
For the middle-distance mountains I applied the two mixed washes plus pure Burnt Umber. Using a wet in wet technique, the washes merged nicely and were left to dry completely. In the meantime a wash of French Ultramarine and Cadmium Yelllow was prepared. This was heavier on the blue than yellow as distant forest have a blue tinge to them. The same wash was also to be used for the mountain on the far right. Before painting the forest, I applied Art Masking Fluid to the buildings and mast of the boat in order to protect the areas that I wanted to remain white. Working quite quickly the forest was painted with a jagged top to give the impression of trees. Whilst drying some Payne's Grey was added to give the impression of tree lines. The nearest mountain was painted ensuring that some contours were obvious, for perspective purposes.
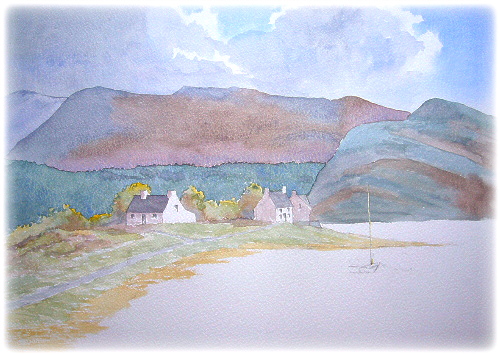
Next is the foreground. Remember that warmer colours are used, therefore greens would be mixed with more yellow. The key thing is to create contrast between the foliage and the buildings. I added a splash of yellow to the tree tops as if they were catching the sunlight, working with dark colours for the shadow areas. Then used the same wash, slightly diluted, for the grass on the bank and a wash of raw sienna for the shoreline. The roofs of the buildings were painted with Payne's Grey and a touch of light red, ensuring that the watercolour paper was untouched leaving white walls. The sides of the buidings in shadow were touched by a wash of French Ultramarine and Light Red; the same used for the clouds. Now for another scary bit - the lake. Note that the reflected colours in a lake are, generally, deeper than those of the surrounding landscape.
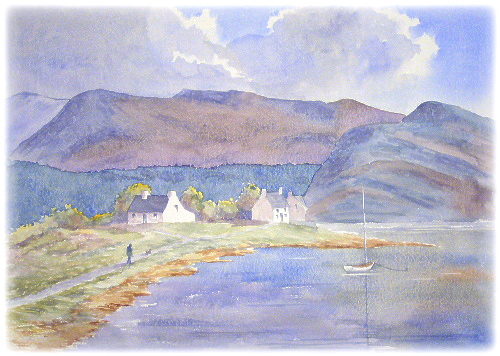
After mixing fresh washes similar to those of the mountains and forest, I used a large brush to wet the lake with clean water and left it to 'half dry'. Then, working quickly applied the washes to reflect the colours in the distance, allowing the washes to flow into each other where appropriate and ensuring that the boat was left white. While still wet, horizontal lines of Payne's Grey were applied here and there to give a flow effect to the lake. Once completely dry the masking fluid was rubbed off leaving white paper for the mast and detail added to the boat. Then shadow detail was added to the mountains before the grassy bank and shoreline was built up with stronger tones towards the foreground. Finally, the man and dog were added for human interest. Congratulations on completing your first watercolour painting.
NUDES
LANDSCAPES
PENGUINS
LEARN TO PAINT