
Combining Web Design with Original Art
Watercolour painting tutorial - trees
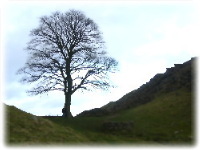
Painting trees is pretty tricky to start with and it takes a lot of practice to get it right but it is really satisfying when you do! Trees are all around us and are fundamental to any landscape painting. It is worth studying trees and, in particular their dimensions. Using Robin Hood's Tree in Northumberland as an example, the width of the lower branches is about the measure as the height of the tree itself. Different tree species will have different width-to-height ratios and it is a good idea to sketch the outline of your trees before comitting paint to paper.
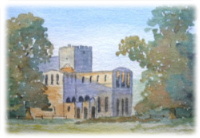
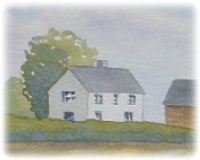
Trees in your painting will indicate the season. For example, it is Winter for Robin's Tree and late Summer in the painting of Lanercost Priory. Also, Trees can be used to frame the subject of the painting, as seen with Lanercost Priory, or can be used to emphasise the shape of buildings like the Farm House below.
Therefore, artistic licence can be used liberally and trees shifted around the scene to create the desired effect, unless of course you are painting a commission of someone's garden! So what about painting trees? First a couple of things you may want to think about. Generally, you can see through trees, they are not just a mass of green therefore you will need to leave some 'air' in your tree. Also, in nature there are hardly any straight lines, this applies to trunks, branches and twigs!
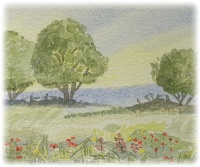
Remember at junior school where painted trees would look like green lollipops? This is not what is required. Consider the tree trunk; it is round and uneven, not always brown, usually in shadow, and at ground level be surrounded by grass or other foliage. I find it best to look at a tree through squinted eyes in order to see what it should look like in watercolour. When you do this, notice how the colours merge with each other and where the light and shadows fall in and around the tree. For trees, my pallette will generally consist of a couple of greens, a couple of browns and a bit of the trusty Payne's Grey.
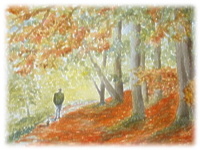
I work on the lower part of the tree trunk first, noting where the light is coming from. The width of the trunk will be painted in a light base colour and when this is slightly damp a darker colour is added to the side of the trunk in shadow. The base of the trunk is never a straight line and will be covered later with some foliage. You should not aim to paint every individual leaf. Instead, use a reasonably large brush and dapple it around using the lighter shade of green, not forgetting to leave some 'air' in the tree. Add darker green, wet in wet, where the leaves are in shadow.
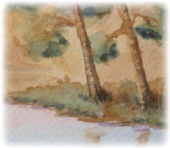
A nice trick for tree trunks is to use wax-resist, which creates the effect seen on the right. Let me explain. By rubbing a bit of wax onto the paper you create an area where the water colour will not dry. Therefore, you will first need to paint the trunk a light shade, allowing ithis to dry completely before adding the wax. For this, I use the edge of a white candle. Then I apply the darker brown to the trunk and allow it to dry. C'est Voila! On each of the paintings on this page, please note the base of the trunks - not a lollipop effect in sight. Once the trunk is dry add dark coloured foliage at the base of the tree, noting that the tree will create its own shadow. Good luck and remember, practise, practise, practise.
NUDES
LANDSCAPES
PENGUINS
LEARN TO PAINT